09 Jun 2015
by lservies
in Card, Cat, Pet, Sympathy
Tags: Beloved Pet, Card, Cards by Lori, Cat Sympathy, Handmade, I Love My Cat, Pet Sympathy, Ribbon, Sorry for your loss, Spellbinders Nestablilities, Teal, Touched by God
Sorry I haven’t posted in so long! I have developed a new passion . . . jewelry-making! I have always loved to make my own jewelry but I was drawn more to making cards. And I still love to make my own cards but I have started an Etsy shop to sell my jewelry. I hope you’ll visit sometime: http://www.TouchedByGod.etsy.com.
My daughter’s boyfriend has a cat named Beast. She was named after the cat from the movie “Hocus Pocus!” (Okay . . . I know the cat was a boy in the movie but our Beast is a girl.) Anyway . . . our Beast died just a little over a week ago. It was a sad day for the Poole Family!
Rewind a couple of years . . . just before Emma, my daughter, left for her freshman year at college, our 11 year old Beagle died of cancer. We lost a family member that day! We have lost pets before that we have grieved but this dog was a member of our family and we were in pain. We still miss her but one thing that helped was the sympathy card(s) that we received. So we decided to send our friends a card. And here is a picture of it:
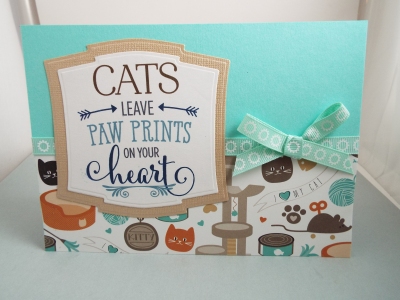
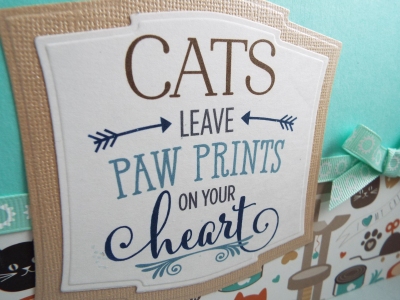 I love these colors. I picked out the teal blue to compliment the patterned paper with the solid paper and the ribbon. This is one of my favorite colors (for now anyway, lol!) We wanted to keep the inside sentiment simple and definitely “not cheesy, mom!”

Very simple and straight to the point! Believe it or not . . . one of the hardest parts of designing a card for me is picking out the font for the sentiment! I have 1000’s of fonts on my computer. Maybe that’s why it runs so slow!
I also like to put a little something on the back of the card. I always put a Bible verse that is applicable to the situation or for cards that don’t necessarily have a scripture, I put John 3:16. I also change up the little icon next to the verse depending on the season. Here is a snap shot of the back of this card:

Supplies:
- 5″ x 7″ Card Base and Envelope
- Teal Solid Paper
- “I Love My Cat” Patterned Paper
- American Crafts Ribbon
- Kraft Textured Solid Paper
- White Cardstock with Printed Sentiment from Silhouette
- Spellbinders Nestablilities
I hope you like my card! Thanks for visiting my blog!
Mwah!
Lori
26 Jan 2014
by lservies
in Birthday, Card
Tags: artisan frame, birthday, Card, Cricut, dots, Silhouette, swiss

So Many Candles,
so little Cake!
Actually, so many Christmas cards . . . Now don’t get me wrong, I love to make Christmas cards. But by the time December 25 rolls around, I am ready to move on to something else . . . ANYTHING else! However, I decided to not push on to Valentine’s Day, not immediately anyway. Although, it was hard to resist those gorgeous shades of pink and red associated with that romantic day. And all those cute and punny sayings! I love making ruler slides that say “You Rule” and pencil slides that say “Be Mine.” Just like Christmas, there are so many great papercrafts to be created for that special someone (or someone-s)!
With all that in mind, I decided to make a left-turn and make a Birthday Card! I saw a similar card to this one on Pinterest. In fact, it is so similar, it’s almost identical, lol! It was designed by Georgeann Manning who designs for Stampin’ Up™. Her blog entry for this card can be found at this address. Now I am always looking for new cute sayings for my cards and I really like this one. But what really caught my eye was that gorgeous turquoise-y color of the card base. I am not ashamed to admit that I “inspire” myself with cards designed by other artists. Rarely though do I make a card that looks identical to the one that jolted my brain cells. I like to mix it up and make each design “my own.” However, I loved so many things about this card that I did not want to change one little thing. It’s gorgeous just the way it is. Hats off to you, Georgeann!
Even though they look very much alike, I am sure we used different supplies and different printing/cutting methods to achieve our looks.
Materials:
- Swiss Dot Turquoise Blue Cardstock
- White Cardstock
- Ecru Cardstock
- Blue Adhesive Gems by K&Company
- Adhesive, Pop-Up Dots, black pen
Instructions:
- Make card base from Swiss Dot Cardstock, 10″ x 7″.
- Score center of card. I used my Martha Stewart™ Box/Envelope Score Board. Fold card to 5″ x 7″ with fold at the top.
- Cut white cardstock using Cricut™ Elegant Edges cartridge into rectangle with scalloped edges, 5″ x 6″.
- Cut ecru cardstock using paper trimmer, 5″ x 5-1/4″.
- Score ecru rectangle with vertical lines. Again, I used my Martha Stewart™ Score board.
- Cut white cardstock using Cricut™ Elegant Edges cartridge into Artisan Frame. I cut this to fit the front of the card, approximately 4-5/8″ wide x 4-3/4″ tall.
- Draw black dashes on artisan frame.
- Assemble card by layering pieces as shown, using pop-up dots to raise the artisan frame for dimension.
- I printed the saying on the frame using Print Master™ software. Use your choice of software or a stamp to add your saying.
- Cut out birthday cake with candles. I used an image from the Sihouette™ On-line Store and cut it on my Silhouette™ SD.
- Attach cake to card and add adhesive gems.
- Finish inside of card as desired.
Again, hats off to Georgeann. I love this card and I will be making many more of them in different colors. This is a great Birthday Card for friends and family alike!

Thanks for visiting,
Lori
21 Jul 2012
by lservies
in Uncategorized
Such an amazing testimony!
 Marie Isom.com
“So, you still believe in a merciful God?” Some of the comments online are genuinely inquisitive, others are contemptuous in nature. Regardless of the motive behind the question, I will respond the same way.
Yes.
Yes, I do indeed.
Absolutely, positively, unequivocally.
Let’s get something straight: the theater shooting was an evil, horrendous act done by a man controlled by evil. God did not take a gun and pull the trigger in a crowded theater. He didn’t even suggest it. A man did.
In His sovereignty, God made man in His image with the ability to choose good and evil.
Unfortunately, sometimes man chooses evil.
I was there in theater 9 at midnight, straining to make out the words and trying to figure out the story line as The Dark NightRises began. I’m not a big movie-goer. The HH and I prefer to watch movies in the comfort…
View original post 954 more words
28 May 2012
by lservies
in Congratulations, Graduation, Uncategorized
Tags: Card, colors, Crafts, Creations, graduation, holder, money, Occasion, Paper, school
 Graduation time is here! I made a very simple (and feminine) 5″ x 7″ graduation card. The color combination is a little different but I wanted the accent color of goldenrod to bring out one of the colors in the butterflies on the patterned cardstock. Graduation cards can be very simple or complex. However, one of the aspects of them that I really like is that you can interchange the colors of paper you use to coordinate with the school colors of the graduate. This card does not do that as I made it to coordinate with the favorite colors of the recipient and, she loves butterflies! So, as you can see, graduation cards can be very versatile. The inside of the card can also contain a favorite inspirational quote or sentiment. In this case, it contained money. A graduate’s favorite gift! To hold the money, I cut a rectangle out of the butterfly cardstock at about 1″ x 3″ and used glue dots (one in each corner) to adhere it to the center of the inside page. I folded the bill and tucked it under the cardstock rectangle and voila, a money-holder card.
Items used:
- Patterned Cardstock – DCWV The Spring Fling Stack
- Card Base – Bazill Basics Paper “Pinkini” – cut to 7″ x 10″
- Contrasting Color – Hobby Lobby Goldenrod
- Spellbinder’s Nestabilities “Fleur de lis Rectangles” Die
- Offray Ribbon “Goldenrod”
- The Paper Studios “Congratulations” Rub-on
- The Paper Studios Butterfly/Flower Stickers
ttyl, lori
18 May 2012
by lservies
in Uncategorized
I don’t like to leave the back of my card blank. Some people do, and that’s ok. However, I like to make my cards look as professional as possible. All the big brand companies put logos, barcodes, prices, etc. on the backs of their cards. I don’t put all those things but I do like to put something that will catch the eye. In the past, I have used a stamp that says something like this, “Handmade for you by . . . . . ” Now I have changed that to a more elaborate selection of graphics and text. Here is a picture of how it looks.
 I use Print Master, which is very inexpensive graphics program to accomplish this. I open a blank project and change my dimensions to the size of the card. I just add a piece of clip art and the text and there you go. Now I do keep these saved as files on my laptop. I have them pre-made to fit several different card sizes and for cards folded at the top or the left-hand side. I also have them pre-made for different clipart that fits the idea of the card. The other day I made a “Congratulations on your piano recital” card. Instead of the bouquet, I used musical notations. I also changed the verse to reflect one that included a musical reference. So you see, it is really easy to create a professional look on the back of the card to match the beautiful creation on the front. Try it yourself, it’s lots of fun.
Love, Lori
17 May 2012
by lservies
in Uncategorized
Tags: artisan, border, Card, color, graduation, greeting, happy, label, neutral, school, summer
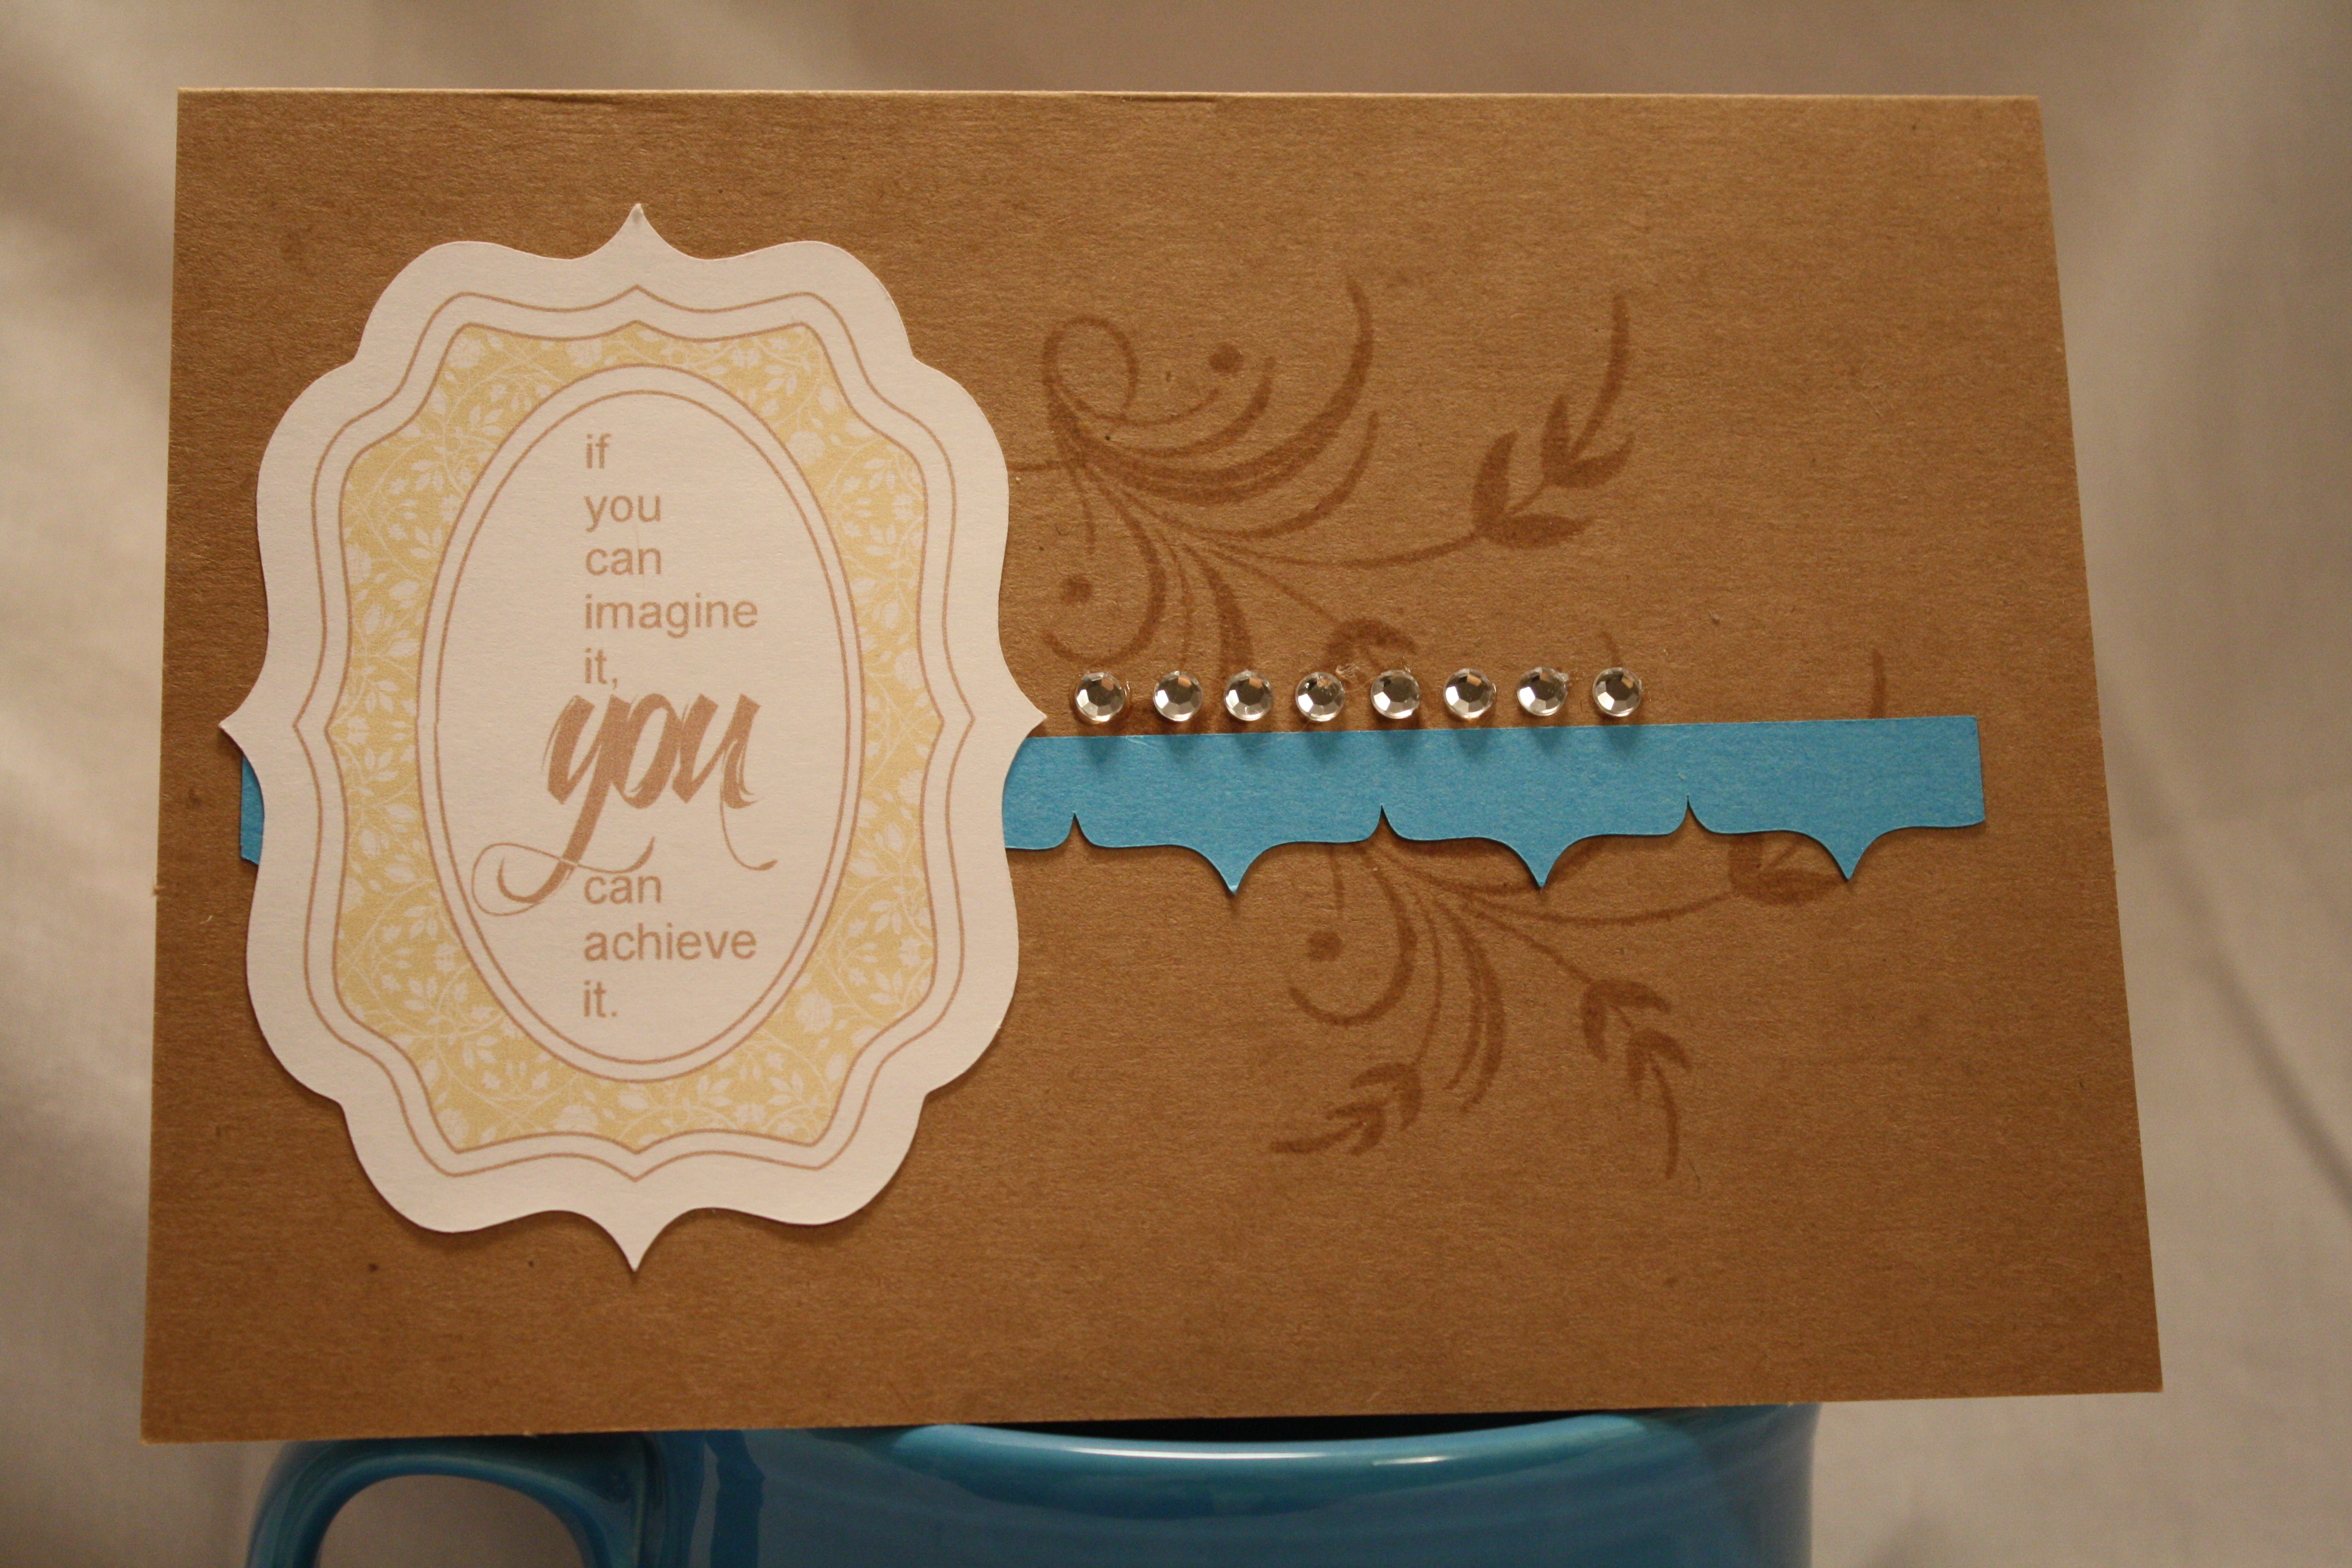
May is an awesome month. Spring is in full swing and quickly running into a beautiful, hot summer. Also, school is winding down as summer continues its fast approach. I love the warm weather and being outside without the threat of contracting frostbite. OK, so I am being a bit dramatic. Temperatures here in East TN can get very cold but usually they do not, even in the midst of Winter. Nevertheless, I adore the warm weather and the feeling of the sun as it beats down on my shoulders and face . . . Hmmm . . . Oh . . . Sorry, I think my mind took a vacation in St. Maartens Island, but it’s back now. {sad face} May holds many things. My favorite thing about May is that it is Graduation Month. It presents a wonderful opportunity to a card-maker, such as myself, to make many, many cards. Now my daughter is not graduating this year, however, we have many friends who are. So I know that I will be making quite a few of these cards this year. This is my first one of the season.

This card, at least on the outside, does not mention the term “graduation.” It is for a young man who is graduating from high school so it needed to be subtle and masculine. I didn’t want puffy, bright flowers or bold colors. It would also be appropriate as an encouragement card to be sent to either a man or a woman.
Instructions:
- Cut a 10″ long x 7″ wide card from Kraft Cardstock
- Score and press down center of card to make a 5″ x 7″ card with the fold at the top
- Using a Versamark Watermark Stamp Pad and a simple flourish stamp, impress the image onto the center-right portion of the front of the card
- I made the Artisan Label and the Artisan Border using a Silhouette SD die-cutting machine. However, a similar label and border can be purchased or punched from cardstock.
- Place the label and border on card front as shown
- Glue eight (8) clear gemstones above border as shown.
I used the Artisan Border because it mimicked the points in the Artisan Label and caused that design to flow throughout the front of the card. Because this card was for a young man, I kept the overall colors neutral with just a splash of color in the border. If you would like it to be more bold, simply change out your colors to suit your need.
Happy Graduation!
07 May 2012
by lservies
in Uncategorized
Tags: Card, Crafts, Creations, Holidays, Ideas, Occasion, Paper
Ok, let me be perfectly clear. My favorite magazine of all favorites is Paper Crafts. My favorite “card” magazine/book is “Card Creations.” I think I have everyone of them. Well, now#10 is out on the shelf! I can’t wait to get it.

Isn’t it beautiful! Officially on sale tomorrow, this very “special” issue features 300 fresh card ideas for every occasion and holiday. Click here to see Paper Crafts web post about its debut. Enjoy!
Previous Older Entries

 I love these colors. I picked out the teal blue to compliment the patterned paper with the solid paper and the ribbon. This is one of my favorite colors (for now anyway, lol!) We wanted to keep the inside sentiment simple and definitely “not cheesy, mom!”